
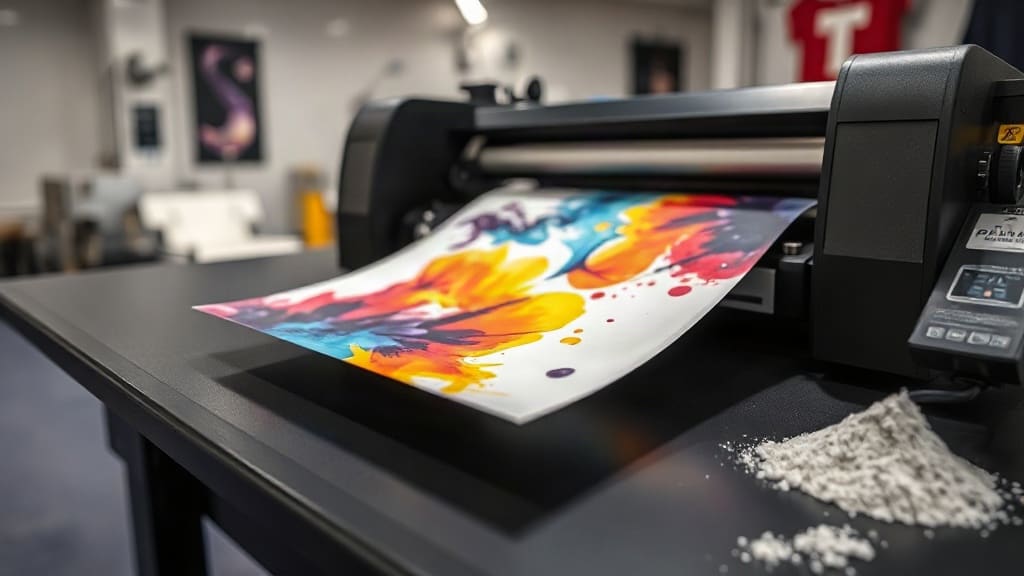
When I first heard about DTF printing, I was skeptical. Could a process that involves printing on film, powder, and heat really produce results as good as screen printing or DTG? After months of testing and plenty of mistakes, I can confidently say that DTF (Direct to Film) has become my go-to method for creating custom apparel. Whether you're a hobbyist or a small business owner, this guide will walk you through the essentials of DTF printing, from setup to finished product, so you can avoid the pitfalls I encountered and achieve professional-looking results.
What Exactly Is DTF Printing?
DTF printing stands for Direct to Film. It's a digital printing technology where your design is printed onto a special film, coated with a hot-melt adhesive powder, and then heat-pressed onto fabric. Unlike DTG (Direct to Garment), which prints directly onto the garment, DTF transfers can be applied to a wide range of materials, including cotton, polyester, blends, and even some treated nylons. This versatility is a game-changer for anyone who works with diverse fabrics.
The process involves several steps: designing, printing, powdering, curing, and pressing. Each step has its own nuances, but once you get the hang of it, the workflow becomes second nature. The beauty of DTF is that it allows for full-color, photographic-quality prints without the need for color separations or screens, making it ideal for short runs and intricate designs.
Why Choose DTF Over Other Printing Methods?
You might wonder why you'd pick DTF over DTG or screen printing. Here's a quick comparison:
- Versatility: DTF works on almost any fabric, including dark and light colors, without pre-treatment. DTG often requires pre-treatment and works best on 100% cotton.
- Durability: When applied correctly, DTF transfers are highly durable, withstanding multiple washes without fading or cracking. I've personally washed test shirts over 50 times, and the prints still look great.
- Cost-effectiveness: For small to medium runs, DTF is more economical than screen printing, which requires setup costs per color. There's no minimum order quantity, so you can print one-off designs.
- Detail: DTF excels at fine details and gradients, making it perfect for photographic images and complex artwork.
Of course, DTF isn't perfect for every situation. For very large orders, screen printing might be cheaper per unit. And if you're printing on 100% cotton, DTG can produce a softer hand feel. But for flexibility and quality, DTF is hard to beat.
Essential Equipment and Materials for DTF Printing
To get started with DTF printing, you'll need a few key items. Here's what I use in my studio:
1. DTF Printer
You can convert an existing inkjet printer (like an Epson) to use DTF inks, or buy a dedicated DTF printer. Dedicated printers are designed for the viscosity of DTF inks and often come with a powder shaker unit. If you're on a budget, a converted printer works, but you'll need to manage powder application manually.
2. DTF Inks
DTF inks are special pigment-based inks that include a white layer. The white ink is crucial for printing on dark fabrics, as it acts as a base for the colors. Quality inks are essential for vibrant, wash-resistant prints.
3. DTF Film
This is a PET film coated with a release layer. It comes in sheets or rolls, in matte or glossy finishes. I prefer matte film because it holds the powder better and reduces glare during printing.
4. Hot Melt Adhesive Powder
This powder is what makes the transfer adhere to the fabric. It's typically TPU-based and comes in different particle sizes. Finer powder (80-200 microns) is better for detailed prints, while coarser powder (200-300 microns) provides a stronger bond for large areas.
5. Heat Press
A heat press is non-negotiable. You need consistent temperature and pressure to cure the powder and apply the transfer. A clamshell or swing-away press works fine; just make sure it can reach 320-350°F (160-175°C).
6. Powder Shaker and Curing Oven (Optional)
For efficiency, a powder shaker automates powder application and shaking off excess. A curing oven ensures even melting of the powder. If you're just starting, you can manually apply powder and use a heat press for curing, but it's more labor-intensive.
Step-by-Step DTF Printing Process
Now that you have your equipment, let's walk through the process. I'll share the exact steps I follow, along with tips to avoid common issues.
Step 1: Design and Print
Create your design in your preferred software (Photoshop, Illustrator, etc.). Remember to mirror the image horizontally before printing, as you'll be pressing it face-down onto the fabric. Print the design onto the DTF film using your DTF printer. Ensure you have the white ink layer set up correctly; typically, the printer prints color first, then white, or vice versa depending on the printer's configuration.
Step 2: Apply Powder
While the ink is still wet, sprinkle the hot melt powder evenly over the printed area. You can use a powder shaker or do it manually. Gently shake off excess powder. You want a thin, even layer that sticks to the ink but doesn't clump. A common mistake is applying too much powder, which leads to a stiff, rubbery feel.
Step 3: Cure the Powder
Place the film in a curing oven or under a heat source at around 320°F (160°C) for 2-3 minutes, until the powder melts and becomes glossy. If you don't have an oven, you can use a heat press with the film between two sheets of parchment paper, pressing for about 10-15 seconds. The goal is to melt the powder so it forms a solid adhesive layer.
Step 4: Press the Transfer
Set your heat press to 320-350°F (160-175°C) with medium pressure. Place the cured film face-down onto the fabric. Press for 10-15 seconds. For best results, use a pressing pillow or place a sheet of parchment paper over the transfer to protect it. After pressing, let it cool completely before peeling the film. You can peel it cold or hot; I prefer cold peel for a matte finish.
Step 5: Post-Pressing (Optional)
For added durability, you can do a second press for 5-10 seconds with a cover sheet. This helps the transfer settle into the fabric fibers.
Common DTF Problems and How to Fix Them
Even with experience, issues can arise. Here are some I've encountered and their solutions:
- Print cracking after wash: This usually means the powder wasn't fully cured or too much powder was applied. Ensure the powder is melted completely and use a fine powder for detailed designs.
- Colors look dull: You might need to adjust your printer's color profile or increase the white ink density. Also, ensure you're using quality DTF inks.
- Transfer not adhering: Check your heat press temperature and pressure. Too little pressure or low temperature prevents proper bonding. Also, make sure the fabric is free of wrinkles and moisture.
- Excessive stiffness: This often results from too much powder or over-pressing. Use less powder and reduce pressing time.
Tips for Achieving Professional Results
After many trials, here are my top tips:
- Test, test, test: Before printing a large order, do a test press on a scrap piece of the same fabric. This helps you dial in your settings.
- Maintain your printer: DTF inks can clog printheads if not used regularly. Print a small test pattern daily and clean the printhead as needed.
- Store film and powder properly: Keep film in a dry, cool place and powder in an airtight container to prevent moisture absorption.
- Use quality materials: Cheap film or powder can ruin your prints. Invest in reputable brands.
- Master the peel: Experiment with hot vs. cold peel to see what gives you the best finish for your designs.
Frequently Asked Questions About DTF Printing
Can I use DTF on 100% polyester?
Yes, DTF works great on polyester. In fact, it often adheres better to polyester than DTG. Just be mindful of the heat settings; polyester can scorch at high temperatures, so use a lower temperature (around 300°F) and test first.
How long do DTF transfers last?
With proper application and care, DTF transfers can last as long as the garment. I've seen prints last over 50 washes without noticeable fading. To prolong life, wash inside out in cold water and avoid harsh detergents.
Do I need a special printer for DTF?
You can convert a standard inkjet printer (like an Epson EcoTank) to use DTF inks, but dedicated DTF printers are more reliable and come with features like white ink circulation. If you're serious, invest in a dedicated printer.
What's the difference between DTF and DTG?
DTF involves printing on film and transferring, while DTG prints directly onto the garment. DTF works on more fabrics and doesn't require pre-treatment, but DTG can produce a softer feel on cotton. Choose based on your fabric and design needs.
Can I reuse DTF film?
No, DTF film is single-use. Once you've pressed the transfer, the film is discarded. However, you can print multiple transfers on one sheet if you plan your layout.
DTF printing has opened up a world of possibilities for me, and I'm confident it can do the same for you. With the right equipment, a bit of practice, and attention to detail, you'll be creating stunning, durable transfers in no time. Remember, every expert was once a beginner. So, fire up your printer and start experimenting. If you have questions, feel free to reach out. Happy printing!