
When I first started experimenting with DTF Transfers, I was skeptical. I had years of screen printing under my belt, and the idea of a digital transfer that could adhere to cotton, polyester, and blends without cracking seemed too good to be true. But after pressing my first design onto a 50/50 tee and washing it a dozen times, I was hooked. DTF, or Direct to Film, has since become my go-to method for small-batch custom apparel, especially for orders that mix fabric types. In this guide, I'll share everything I've learned about DTF transfers, from choosing the right film to troubleshooting common issues, so you can skip the trial and error and get straight to producing prints that look and feel professional.
What Are DTF Transfers?
DTF transfers are a type of heat-applied decoration where your design is printed onto a special film, coated with a thermoplastic adhesive powder, and then transferred to fabric using a heat press. Unlike DTG (Direct to Garment) printing, which prints directly onto the shirt, DTF involves a two-step process: printing on film, then transferring. This intermediate step gives DTF a unique advantage: it works on almost any fabric, including those that are difficult for other methods, like nylon, leather, and treated polyester. The prints are also known for their stretchability and durability, making them ideal for activewear and garments that undergo frequent washing.
The DTF Printing Process
The process starts with a digital printer equipped with special DTF inks (usually CMYK plus white). The design is printed onto a PET film, with white ink acting as a base to make colors pop on dark garments. While the ink is still wet, a fine adhesive powder is applied and then melted into the ink using a heat source. This powder is what allows the transfer to bond with the fabric. Once cooled, the film can be stored or immediately pressed onto a garment. The pressing step uses heat and pressure to release the design from the film and adhere it permanently to the fabric.
Why Choose DTF Over Other Methods?
There are several reasons why DTF has gained popularity among crafters and small businesses. First, it requires no weeding or cutting, which saves time and reduces waste. Second, it works on a wide range of fabrics, so you can offer more options to your customers. Third, the prints are soft and stretchy, unlike the plastic feel of some vinyl transfers. Finally, DTF is cost-effective for short runs because you don't need screens or setup fees. For a detailed comparison, you can check out our DTF transfers guide, but here I'll focus on the practical aspects.
Getting Started with DTF Transfers
If you're new to DTF, the equipment and supplies can seem overwhelming. Let's break down what you need and how to set up your workflow.
Essential Supplies
To produce DTF transfers, you'll need:
- A DTF printer (or access to a printing service)
- DTF ink (CMYK and white)
- PET film (usually 75-100 microns thick)
- Adhesive powder (TPU-based)
- A heat press or curing oven
- A heat press for application
- Protective paper or Teflon sheet
If you're not ready to invest in a printer, you can order pre-printed transfers from a supplier. That's actually how I started: I ordered custom transfers from a reputable company, pressed them onto shirts, and sold them at local markets. Once I saw the demand, I invested in my own setup.
Choosing the Right Film
Not all PET films are created equal. The film's thickness and coating affect how well the ink releases and how the final print feels. Thinner films (around 75 microns) tend to produce softer prints but can be more prone to curling during printing. Thicker films (100 microns) are more forgiving but may leave a slightly stiffer hand. I recommend experimenting with a few brands to see what works best with your printer and typical designs. Also, consider double-sided film if you want to print on both sides, though that's more advanced.
Step-by-Step DTF Transfer Application
Applying a DTF transfer is straightforward, but the details matter. Here's the process I follow for consistent results.
Step 1: Prepare Your Workstation
Set your heat press to the recommended temperature, usually between 300°F and 325°F (150°C to 160°C). Prepress the garment for 3-5 seconds to remove moisture and wrinkles. This step is crucial; any moisture can cause the transfer to peel or bubble.
Step 2: Position the Transfer
Place the DTF transfer on the garment with the printed side facing up. If you're using a film with a clear backing, the design will be visible. Use heat-resistant tape to hold it in place if needed.
Step 3: Press the Transfer
Cover the transfer with a protective sheet (Teflon or parchment paper) and press with medium to firm pressure for 10-15 seconds. The exact time depends on your press and the film manufacturer's recommendations. I always do a test press on a scrap piece of fabric to dial in the settings.
Step 4: Peel the Film
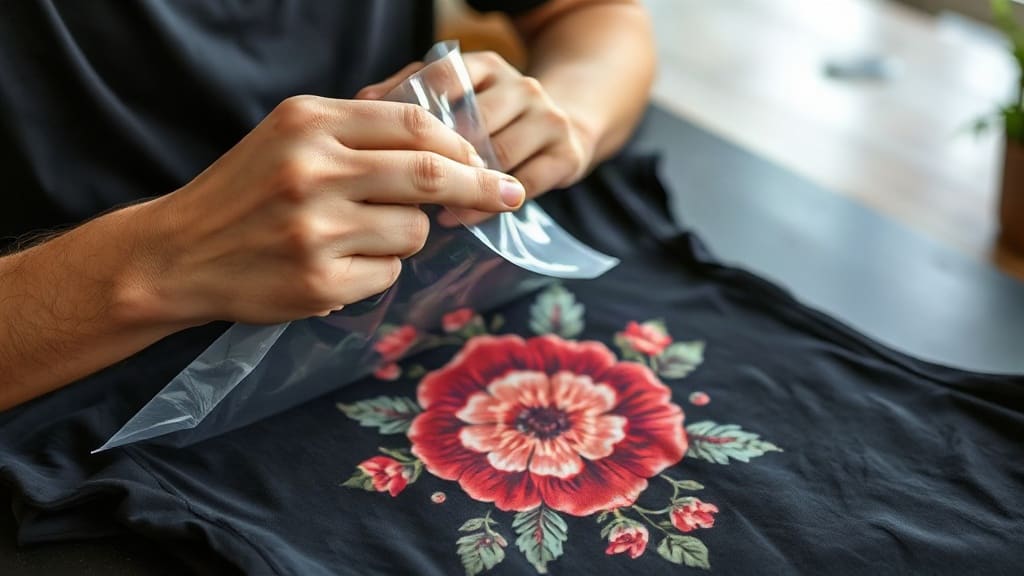
Wait for the transfer to cool completely before peeling. This is a "cold peel" process for most DTF films. Peeling while hot can cause the design to stretch or tear. Once cool, peel the film off in a smooth, steady motion. If any parts of the design lift, press again for a few seconds.
Step 5: Post-Press for Durability
For added durability, especially on stretchy fabrics, cover the design with a protective sheet and press again for 5-10 seconds. This helps the adhesive fully cure and improves wash resistance.
Troubleshooting Common DTF Issues
Even with experience, you'll run into problems. Here are fixes for the most common ones.
Prints Cracking or Fading After Washing
This usually means the transfer wasn't pressed long enough or at a high enough temperature. Increase the temperature by 10°F and extend the press time by 5 seconds. Also, ensure you're using the correct pressure; too little pressure prevents proper adhesion.
Transfer Not Sticking to Fabric
If the transfer peels off easily, the fabric might be too textured or have a coating (like water repellent). Try pressing longer or using a higher pressure. For tough fabrics, pre-treat with a heat press to smooth the surface.
Colors Look Dull on Dark Garments
This happens when the white ink layer is too thin. When printing your own transfers, increase the white ink density. If you're buying transfers, ask your supplier about the white layer. Alternatively, use a double-layer transfer: press one, peel, then press another on top.
Film Curling During Printing
High humidity can cause the film to curl. Store film in a dry place and consider using a dehumidifier in your print room. Also, adjust your printer's platen temperature if possible.
DTF Transfers vs. Other Heat Transfer Methods
Understanding how DTF stacks up against other methods will help you choose the right one for each job.
DTF vs. HTV (Heat Transfer Vinyl)
HTV requires weeding, which is time-consuming for intricate designs. DTF has no weeding and can handle fine details and gradients. However, HTV can be more cost-effective for simple one-color designs. DTF also has a softer feel and better stretch.
DTF vs. DTG
DTG prints directly onto the garment, so it's faster for single items. But DTG requires pre-treatment and works best on 100% cotton. DTF works on almost any fabric and doesn't need pre-treatment. DTF also produces more vibrant colors on dark shirts because of the white ink base.
DTF vs. Screen Printing
Screen printing is unbeatable for large orders of the same design on similar fabrics. It's cost-effective at scale and offers excellent durability. DTF is better for small batches, detailed designs, and mixed fabrics. Many shops use both, choosing based on the order.
Washing and Caring for DTF Prints
To ensure your DTF prints last, follow these care instructions:
- Wait 24 hours after pressing before washing.
- Turn the garment inside out.
- Machine wash cold with mild detergent.
- Avoid bleach and fabric softeners.
- Tumble dry low or hang dry.
- Do not iron directly on the print; use a pressing cloth if needed.
Following these steps, I've had DTF prints last over 50 washes with minimal fading.
Frequently Asked Questions
What fabrics can I use with DTF transfers?
DTF transfers work on a wide range of fabrics, including cotton, polyester, blends, nylon, leather, and even some treated materials. The key is that the fabric can withstand the heat of the press (usually 300°F+). For heat-sensitive fabrics, test a small area first.
How long do DTF transfers last?
With proper application and care, DTF transfers can last as long as the garment itself. In my experience, they easily withstand 50+ washes without significant fading or cracking. The adhesive powder and ink quality play a big role, so choose reputable supplies.
Can I layer DTF transfers?
Yes, you can layer DTF transfers to create multi-color or multi-layer designs. Press the first transfer, peel, then press the second on top. Use a protective sheet between layers. This technique is great for adding highlights or creating a 3D effect.
Do I need a special printer for DTF?
You need a printer that uses DTF ink and can handle PET film. Many converted Epson printers are popular for DTF. Alternatively, you can outsource printing to a DTF service and just do the pressing yourself. That's a low-cost way to start.
How do I store DTF transfers?
Store unused transfers in a cool, dry place, away from direct sunlight. Keep them flat to prevent curling. If stored properly, they can last for months. I keep mine in a zip-top bag with a desiccant packet to control moisture.
DTF transfers have opened up a world of possibilities for my custom apparel business, and I'm confident they can do the same for you. With the right supplies, a bit of practice, and attention to detail, you'll be producing vibrant, durable prints that impress your customers. If you're ready to dive in, explore our DTF Pro Kit for everything you need to get started.